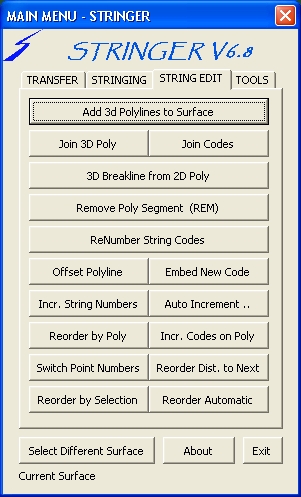
String Edit Menu - Click on a Tab |
 |
Add 3D Polylines to Surface |
Allows the user to select 3D polylines to be added to the current surface as breaklines. |
|||
Join 3D Poly |
Allows the user to join two selected lines/polylines to make one 3D polyline. |
|||
Join Strings by Amending Codes |
For when 2 strings should be the same string but have different string codes, which happens frequently on multi day jobs. By selecting the last point of the first string and then the first point of the second string, the program changes the code of the second string to that of the first string. The program will reverse the order of the second string if necessary | |||
3D Poly from 2D Poly |
Allows the user to create a 3D polyline from a 2D Polyline passing through points on the surface. The created 3D polyline will be created on a layer with the same name as the 2D polyline with the suffix _3D. For example if the 2D polyline was on a layer RD_EB then the 3D polyline will be created on RD_EB_3D. |
|||
Remove Poly Segment |
Select a 3D polyline segment and the segment is erased leaving the remaining components of the polyline in the drawing. If the polyline was not closed then two new polylines will be created. |
|||
Offset Polyline |
Allows the user to select an existing polyline and then select a template to be drawn on that polyline. If a 3D polyline is selected then the software will offset with 3D polylines and add them to the surface. If a 2D polyline is selected then the software will offset 2D polylines only. If no template is selected (selecting Cancel at the template selection dialog box) then the user can specify the offset required. When a 3D polyline is selected, the user will be prompted for a horizontal and vertical offset. |
|||
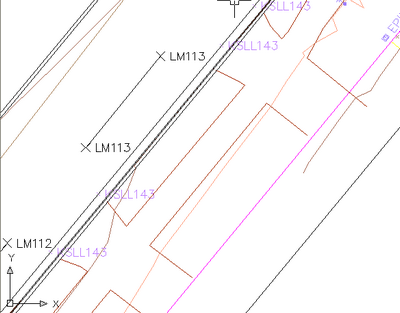
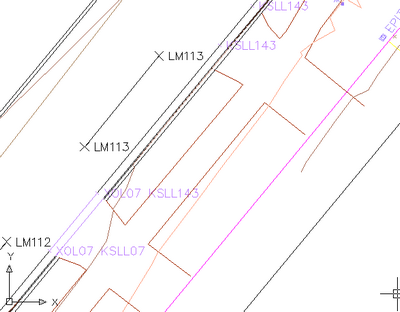
Embed New Code |
Used for when a new string code needs to be inserted into an existing string code, such as replacing a section of kerbing with a crossover. The programme will add the new code to the selected points (automatically finding a unique string number for the code). It will then find a new unique string number for the continuing string.
Here we have embedded XOL (Cross over Left) into the string KSLL143. Notice that the second (and subsequent) points have had the code KSLL143 changed to KSLL07, which was the next unique string number for code KSLL. |
|||
Increment String Numbers |
Allows the user to increment the string number of a selection of stringable points by a specified amount. You may select the points individually or by group (remembering that _all points is a group) | 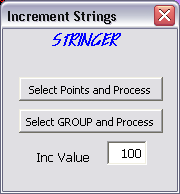 |
||
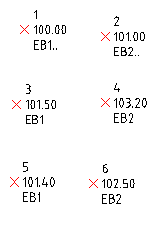
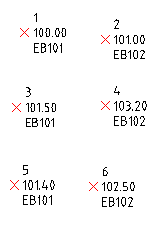
Auto Increment .. |
This command allows the user to automatically increment string numbers for points of common string codes in point number order. Using EB1.. again in the above example would result in Stringer creating a new, unique, string number that would be applied to all subsequent points with code EB1 |
|||
 |
 |
|||
Reorder Point Numbers based on Selected Polyline |
Allows you to select a polyline which has a civil3d point at each vertex and sort the point numbers in ascending order based on the selected polyline. This means you can manually draw a polyline then select to reorder the points based on that polyline. |
|||
Inc Codes on Polyline |
Allows you to select a polyline which has Civil3d points at each vertex with the intention of changing the raw description of each of those points based on the new description you enter. This is especially useful for jobs that have been manually strung and you would like the points to reflect the string codes. |
|||
Switch Point Numbers |
Simply allows the user to select 2 points and switch the point numbers between those 2 points. Intended for when a couple of points are surveyed out of sequence. |
|||
Reorder by Next Distance |
Reorders the points with the same code based on the shortest distance to the next point. After selecting the first point (which also sets the code to scan for) the programme automatically reorders the point numbers based on the next nearest point. |
|||
Reorder Point Numbers by Selection |
Allows the user to select a range of points in the order that they would like the point numbers to increase. It uses the point numbers of the points selected and simply reorders them so that they increase in the same order as the order they were selected in. Intended for when a series of points on a string line have been surveyed out of sequence. |
|||
Reorder Automatic |
Reorder Points either by angle or linear distance. Angle option orders in an Anti Clockwise direction based on a start point, centre point, and code. After selecting the point which is the start point for the ordering, you select the centre point about which the ordering is to be calculated. The simplest case for this is a roundabout where the point numbers are not in the correct order. This routine will renumber the points so the string line is correct. If you do not select a centre point then linear sorting by distance is used whereby points are reordered in ascending distance from the start point. | |||